When to Upgrade Your Attic Insulation for Energy Savings

A well-insulated attic acts as a barrier against heat loss in the winter and heat gain in the summer, and greatly contributes to lowering energy bills and a creating a more comfortable indoor environment. Let’s explore some of the signs indicating that it might be time to upgrade your attic insulation, what the benefits of doing so are, and the various insulation options available to homeowners.

Signs Your Attic Insulation Needs an Upgrade

Temperature Fluctuations

One of the primary indicators that your attic might have insufficient insulation is a noticeable fluctuation of temperature within your home. If some rooms are consistently colder in the winter and warmer in the summer, it could suggest that your attic is not regulating the transfer of heat efficiently. Upgrading insulation can help your home maintain a more consistent indoor temperature, and let your heating and cooling systems work at their optimal levels.

High Energy Bills

Have you noticed a steady increase in your energy bills, despite using your heating or cooling system as usual? This could be a sign that your attic insulation is not performing its best. Inadequate insulation lets heat escape in the winter and infiltrate in the summer, which causes your HVAC system to work harder and consume more energy. An insulation upgrade can lead to big savings on your energy bills over a period of time.

Ice Dams in the Winter

Are there ice dams forming along the eaves of your roof in the winter? It could be because heat is escaping through your under-insulated attic. As snow on the roof melts and refreezes at the eaves, it can lead to ice dam formation, which has the potential to cause damage to your roof and gutters. By upgrading the attic insulation, your roof surface can maintain a consistent temperature, which will prevent the conditions that contribute to ice dam formation.

Drafts and Air Leaks

Feel for drafts in your home, particularly in the upper levels. If you notice cold drafts or air leaks, it could indicate insufficient insulation in the attic. Check around windows, doors, and other openings for gaps, as these areas are common sources of air infiltration. Properly sealing these gaps and upgrading attic insulation can improve energy efficiency and your family’s overall comfort.

Uneven Heating and Cooling

An under-insulated attic can lead to uneven heating and cooling throughout your home. Some rooms may feel excessively warm while others feel chilly. This inconsistency in temperature distribution is often times a result of heat escaping or entering through the attic. Upgrading insulation can ensure a more balanced distribution of heat and create a more comfortable living environment. Contacting a professional insulation installer can help you with this task.

How to Assess Your Attic Insulation

Visual Inspection

Begin by visually inspecting your attic. If you can see the floor joists or if you notice that the insulation is below the level of the joists, it might not be enough. The recommended insulation level for most attics is between 10 and 14 inches, but this can also vary based on your location and your climate.

Measure Insulation Depth

Use a ruler or tape measure to figure out the depth of your attic insulation. If it falls below the recommended level, you may want to consider adding more. Common insulation materials include fiberglass, cellulose, and spray foam, with fiberglass batt insulation offering many distinct advantages.

Check for Air Leaks

If there are any visible gaps or cracks in your attic, seal them up. Focus on the areas around vents, pipes, chimneys, and light fixtures. Use expanding foam or caulk to close the gaps and to prevent warm air from escaping and cold air from infiltrating.

Evaluate Attic Ventilation

Proper attic ventilation is an important strategy for preventing moisture buildup, which can lead to mold and mildew. Make sure your attic has adequate ventilation through soffit vents and ridge vents. Well-ventilated attics promote good air circulation and maintain a consistent temperature.

Inspect Attic Windows

Take a look and assess the condition of your attic windows. Installing energy-efficient double-pane windows can contribute to insulation and temperature control. Properly sealed and insulated windows help maintain a comfortable environment in your attic space, as well as preventing drafts and thermal transfer to the living spaces below.

Consider Professional Assistance

It’s true that all of these steps might seem daunting, that’s why it’s always a good idea to consult with professional insulation installers to help you get started. They can conduct a comprehensive evaluation, recommend suitable upgrades, and also ensure proper installation.

Benefits of Upgrading Attic Insulation

Energy Savings

One of the biggest benefits of upgrading your attic insulation is reducing your energy consumption. Because a well-insulated attic minimizes the transfer of heat, it lets your HVAC system operate more efficiently. This will result in lowering your energy bills and you’ll enjoy long-term savings.

Enhanced Comfort

Your home should be your comfort zone. Upgrading your attic insulation creates a more consistent and comfortable indoor environment for your family. Say goodbye to chilly drafts, uneven temperatures, and the need to constantly adjust your thermostat. Improving your insulation will contribute to a more balanced distribution of heat throughout your home.

Prevention of Ice Dams

Proper attic insulation helps prevent the formation of ice dams on your roof, safeguarding your home from potential water damage. By maintaining a more consistent roof temperature, you reduce the risk of ice dams during the winter months.

Increased Home Value

Whether you’re thinking about selling your home now or in the future, you’ll have peace of mind knowing that energy-efficient homes with proper insulation often have higher market values. Buyers have become savvier and are increasingly aware of the importance of energy efficiency, which will make a well-insulated attic an attractive feature whenever you do decide to sell your home.

Choosing the Right Insulation Material

Fiberglass Insulation

Fiberglass batt insulation is a popular and cost-effective choice. It may also be blown in and is well-known for its superior thermal performance. Owens Corning fiberglass is an extremely safe option and has also received the coveted Energy Star Certificate. 

Cellulose Insulation

Made from recycled paper products, cellulose insulation is an eco-friendly option. It is often blown into attics as loose-fill insulation. Cellulose provides excellent thermal performance and can be an effective choice for attics with irregular shapes.

Blown In Insulation

Blown in insulation, whether fiberglass or cellulose, is applied as loose-fill using a blowing machine. This method provides an even coverage and can be an efficient option for attics with irregular shapes or hard-to-reach areas.

A well-insulated attic is an important, vital component of an energy-efficient and comfortable home. When you are able to recognize the signs of under-insulation and take the proactive steps necessary to address them, you can enhance the overall thermal performance of your living space. The long-term benefits of proper attic insulation make it a worthwhile investment in your home’s comfort, energy efficiency, and value. Regular maintenance and periodic attic assessments will ensure that your attic insulation performs optimally for years to come and provide you with ongoing energy savings and a more pleasant living environment.

If you would like guidance with assessing the condition of your attic insulation or would like more information regarding upgrading, we are here to help. Attic Construction is committed to providing their customers in the American Southwest with the best, most efficient and reliable service. Call us today to schedule your free attic inspection consultation.

Is Your Attic Under-Insulated? Here’s How to Tell

One of the key factors in ensuring your home’s overall comfort and energy efficiency is the effectiveness of the attic insulation. A well-insulated attic acts as a barrier against heat loss in the winter and heat gain in the summer, ultimately impacting your energy bills and the overall comfort and serenity of your home. Read on to discover if your attic may be under-insulated, as well as insights on how to address this issue to create a more energy-smart and pleasant living environment.

What are Signs that Your Attic is Under-Insulated?

Temperature Fluctuations

One of the primary indicators of insufficient attic insulation is noticeable temperature fluctuations within the rooms of your home. If you are noticing that certain rooms are colder in the winter and warmer in the summer, it could be a sign that your attic is not effectively regulating the transfer of heat.

High Energy Bills

Do you get sticker shock when you open your utility bill? If your energy bills are increasing, this could be a red flag that your heating and cooling systems are working overtime to compensate for poor attic insulation. A well-insulated attic helps to maintain a stable indoor temperature, reduces the workload on your HVAC system and, consequently, lowers energy costs.

Ice Dams During The Winter

If you observe the formation of ice dams along the eaves of your roof during winter, it could be a result of heat escaping through an under-insulated attic. As snow on the roof melts and refreezes at the eaves, it can lead to ice dam formation, potentially causing damage to your roof and gutters.

Drafts and Air Leaks

Take notice of any drafts in your home, particularly in the upper levels. If you discover cold drafts or air leaks, it could indicate inferior insulation in the attic. Check for any gaps around the windows, doors, and other openings, as these areas are common sources of air infiltration.

Uneven Heating and Cooling

An under-insulated attic can lead to uneven heating and cooling throughout your home. Some rooms might feel excessively warm while others remain chilly. This inconsistency in temperature distribution is often a result of heat escaping or entering through the attic.

How Do You Assess Your Attic Insulation?

Visual Inspection

You can start the process of discovering if your attic is under-insulated by visually inspecting your attic. If you can see the floor joists or if you notice that the insulation is below the level of the joists, the insulation itself might be insufficient. The recommended insulation level for attics will vary and depends upon the material, thus it is always best to have a professional inspection.. Talking to a professional attic insulation installer can help you determine what is best for your attic.

Measure Insulation Depth

Use a ruler or tape measure to determine the depth of your attic insulation. If it falls below the recommended level, you might consider adding more insulation. Common insulation materials include fiberglass, cellulose, and spray foam, with blown-in insulation ranked among the best.

Check for Air Leaks

Seal any visible gaps and cracks in the attic. Focus on areas around pipes, chimneys, vents, and light fixtures. Use caulk or expanding foam to close these gaps and prevent warm air from escaping and cold air from infiltrating.

Evaluate Attic Ventilation

Proper attic ventilation is important for preventing moisture buildup, which can directly lead to mold and mildew. Be sure your attic has adequate ventilation through the soffit vents and ridge vents. Well-ventilated attics promote air circulation and are able to maintain a consistent temperature.


Consider Consulting with Professional Attic Insulation Installers

If the idea of assessing and upgrading your attic insulation seems like an overwhelming project, you may want to consider consulting with professional insulation installers. They can conduct a comprehensive evaluation, recommend suitable upgrades, and make sure the attic installation is properly installed.

What are the Benefits of Proper Attic Insulation?

Energy Savings

When your attic insulation is sufficient and working well, it reduces the strain on your heating and cooling systems, which will pleasantly lead to lower energy bills. By minimizing heat transfer, your HVAC system operates more efficiently, and consumes less energy to maintain a comfortable temperature.

Improved Comfort

Well-insulated attics create a more consistent and comfortable indoor living environment. Say goodbye to chilly drafts and uneven temperatures! The proper amount and type of insulation ensures a balanced distribution of heat throughout your home.

Prevention of Ice Dams

Proper insulation helps prevent the formation of ice dams on your roof, which ultimately safeguards your home from potential water damage. When you are able to maintain a more consistent roof temperature, you greatly reduce the risk of ice dams forming during the winter months.

Increased Home Value

Energy-efficient homes that are properly insulated often have higher market values. More and more, potential buyers are aware of the importance of energy efficiency, making a well-insulated attic an attractive feature when selling your home.

Environmental Impact

Reducing energy consumption not only benefits your wallet, it also contributes to a smaller environmental footprint. By optimizing your home’s energy efficiency, you are able to play a part in conserving resources and minimizing greenhouse gas emissions.

A well-insulated attic is a fundamental component of an energy-efficient and comfortable home. By recognizing the signs of under-insulation and taking the proactive steps to address them, you can enhance the overall performance of your living space. The long-term benefits of proper attic insulation are a worthwhile investment in your home’s comfort, energy efficiency, and value.

If you are interested in evaluating the attic insulation levels in your home and to make sure that the attic insulation is working at its optimal efficiency, we can help you through a free consultation. With over a decade of excellence in this industry and a plethora of satisfied clients in the Southwest American region, we would be pleased to help you with your attic insulation project.

Insulation Replacement: What You Need to Know

As the chill of winter settles in, the comfort of your home becomes supremely important. If you’ve noticed a draft or felt a lingering coldness indoors, it might be time to turn your attention to a critical element—your attic insulation. 

Recognizing the Signs: When is it Time for Attic Insulation Replacement?

What are the signs that could indicate your current insulation may be falling short? One of the most evident indicators is fluctuating indoor temperatures. If your home struggles to maintain a consistent and comfortable temperature, especially during extreme weather conditions, your insulation might be flawed in some way. Pay attention to cold spots or drafts in various rooms, as these are often symptomatic of insulation issues.

Another telltale sign is an increase in energy bills without a corresponding increase in energy usage. Poor insulation lets heated or cooled air escape, forcing your heating system to work harder to maintain your desired temperature. This increased strain on your HVAC system inevitably leads to higher energy consumption and, of course, inflated utility bills. If you’ve noticed a steady rise in your energy costs, it might be a good time to assess the state of your insulation and consider improving insulation energy efficiency.

Water damage or the presence of mold and mildew can also be indicative of insulation problems. Moisture can negate the full effectiveness of insulation, leading to a range of issues. Regular inspections, especially after severe weather events, will help you discover any issues that arise early on.

Understanding Your Options: Exploring the World of Insulation Materials

Once you’ve identified the need for insulation replacement, the next step is to explore the variety of insulation materials available. 

  • Fiberglass Insulation: Fiberglass batt insulation is one of the most common and widely used types. Composed of fine glass fibers, it is known for its cost-effectiveness and versatility. Fiberglass insulation is relatively easy to install in attics, walls, and crawl spaces. It provides homeowners with excellent thermal resistance and is also resistant to moisture, which minimizes the risk of mold growth. Owens Corning is an superb choice for homeowners looking to effectively insulate their attic as it is extremely safe and has received the Energy Star Certificate.
  • Cellulose Insulation: Made from recycled paper or plant fibers, cellulose insulation is treated with fire-retardant chemicals to enhance its resistance to fire, insects, and mold. Professionals can use blown in cellulose insulation to insulate attics or wall cavities and create a seamless barrier against heat transfer.
  • Spray Foam Insulation: This type of home insulation offers good thermal resistance and is effective in sealing gaps and cracks. Spray in attic insulation expands upon application, filling every nook and cranny to create an airtight barrier. It is ideal for insulating irregularly shaped spaces and is known for its durability.
  • Mineral Wool Insulation: Comprising rock or slag wool, mineral wool insulation is fire-resistant and is available in batts or loose-fill form and is often used in areas requiring fire resistance, such as around chimneys or furnace flues.

The Energy-Saving Impact: How Home Insulation Replacement Translates to Cost Efficiency

Investing in home insulation replacement is not merely an upfront cost; it’s a strategic move that can yield significant long-term benefits, particularly in terms of energy savings. Upgrading your insulation enhances the thermal efficiency of your home, and reduces the strain on your heating and cooling systems. This, in turn, leads to lower energy consumption and more manageable utility bills.

Consider the scenario of an inadequately insulated home during extreme temperature seasons like summer and winter. The heat or conditioned air generated by your furnace would constantly be escaping through poorly insulated walls, attic spaces, and windows. As a result, your HVAC system would operate nearly continuously, consuming more energy to compensate for the energy loss. By replacing or upgrading your insulation, you create a more effective thermal barrier, and allow your system to operate more efficiently by reducing the frequency and duration of its cycles.

Navigating the Process: Insulation Replacement Dos and Don’ts

An attic insulation replacement project requires planning and execution. While it’s a valuable investment in your home’s comfort and energy efficiency, there are certain dos and don’ts to keep in mind for a successful outcome.

Dos:

  • Conduct a Thorough Assessment: Before doing anything, conduct an assessment of your home’s insulation needs. Consider consulting with a professional insulation installer to identify specific areas that require attention.
  • Choose the Right Material: Selecting the appropriate insulation material is crucial. Owens Corning fiberglass batt insulation is, by far, an exceptional choice.
  • Professional Installation: While some home insulation materials lend themselves to DIY installation, it’s advisable to enlist the services of a professional insulation installer.
  • Address Air Leaks: Insulation works best when it’s complemented by effective air sealing. Look for gaps, cracks or leaks in your home’s structure before installing new insulation.
  • Consider Ventilation: Adequate ventilation prevents moisture buildup in your home. Make sure that your insulation installation replacement project takes into account proper ventilation strategies, especially in areas prone to humidity or condensation.

Don’ts:

  • Overlooking Safety Measures: Always adhere to safety guidelines, wear appropriate protective gear, and ensure proper ventilation during installation.
  • Ignoring Building Codes: Familiarize yourself with local building codes and regulations related to home insulation. Not complying with these codes could result in complications down the line, including issues with home inspections as well as potential safety hazards.
  • Neglecting Moisture Issues: Insulation and moisture are not compatible. Address any existing moisture issues like leaks or water damage, before new insulation installation. Moisture can compromise the effectiveness of insulation and lead to mold growth.
  • Rushing the Process: Patience is key when it comes to insulation replacement. Rushing the project can result in overlooked issues, and an overall reduction in the insulation’s effectiveness. Take the time to plan and execute each step meticulously.

Transforming Your Home, One Layer at a Time

Beyond the immediate impact on your comfort, attic insulation replacement is a strategic investment that pays dividends in terms of energy efficiency and cost savings. When you know the signs that may indicate the need for insulation replacement, have an understanding of the insulation materials available, and insights into the energy-saving benefits, you’re well-equipped to get started.

And, the good news is, you don’t have to take it all on alone. Attic Construction has been proudly serving the American Southwest for over a decade. If you have questions regarding the integrity or effectiveness of your current attic insulation, we offer a free consultation to get you started. Give us a call today!

How to Insulate an Attic Knee Wall

Whether you’re renovating for an attic conversion or building a new custom home, you might be exploring the possibility of installing knee walls in your attic space. But, since knee walls are typically found in completed attic spaces or homes where the roof serves as the ceiling for the top floor, insulation is critical in this area.

If you’re looking to learn how to insulate a knee wall, you’ve come to the right place—this guide will explore what knee walls are, when and why you might add one to your attic space, your insulation product options, and how to insulate this space. 

What Is a Knee Wall?

A knee wall is a short vertical wall that connects the angled roof trusses (or rafters) to your home’s horizontal floor joists.1 They’re used as load-bearing walls, unlike the freestanding “pony walls” used to divide rooms in a living space.

Knee walls are typically covered with drywall, and they serve a few different purposes in an attic space:
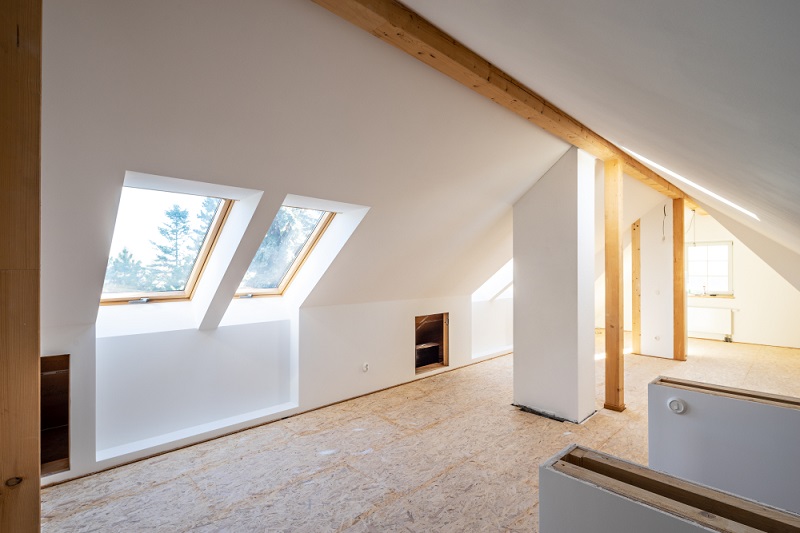
  • They create a flat, vertical surface for electrical wiring, outlets, and light switches.
  • They enclose a conditioned space immediately beneath the roof deck and an unconditioned space in the “triangle” where the trusses terminate, meet the exterior wall, or connect to each floor joist.
  • They protect attic spaces from potential air or water leakage where the trusses meet the exterior wall (which shouldn’t happen with proper sealing, but sealants degrade over time). 

Importantly, they’re one of the spaces that the US Department of Energy recommends installing attic insulation to achieve optimal thermal regulation and HVAC system performance for better home efficiency —“In finished attic rooms with or without dormers, insulate between the studs of knee walls.”2

When and Why You Might Need One

So, why would you install a knee wall space in your attic in the first place? 

Most knee walls are found in finished attics. In these spaces, the “ceiling” is the underside of the roof, which is usually made from a combination of wooden (or metal) trusses and plywood. 

But homeowners with finished attic spaces may still want additional storage on the top floor—conditioned or otherwise. Knee walls create this attic access space by vertically connecting the trusses to the floor joists, enclosing the conditioned space on one side and an unconditioned, triangular storage space on the other. To access the unconditioned space, homeowners typically install small doors or hatches to the attic floor, which can be utilized as an attic storage solution. 

If you’re finishing your attic space, you may consider drywalling your attic ceiling and the knee walls. But, even if you drywall only one or neither of these spaces, you should always insulate the insides of exterior walls to prevent heat transfer and help your HVAC system run more efficiently. 

Insulation Options for Knee Walls

So, what are your options for knee wall insulation? 

If the knee wall is still under construction—even if the rest of your home is already finished—you can use any rigid insulation product, including:

  • Batt insulation
  • Blown-in products
  • Spray foam insulation
  • Insulation panels or sheets

Simply add insulation between each knee wall joist after installing any electrical or HVAC system equipment. Then, cover the knee wall with drywall (or any other interior finishing material, like paneled wood or brick/brick veneer). 

But, if your knee wall is already finished, you’ll need to access the area inside of it to add insulation. There are a few different ways this could play out:

  • If your knee wall is covered with bricks, you’ll need to remove just a few or all of the bricks. 
  • If you remove all of the bricks, you can use any insulation product.
  • If you remove just a few, you’ll have to use a blown-in product, such as spray foam insulation.
  • If your knee wall is covered with wood paneling, it most likely makes sense to remove all of it and add any crawl space insulation material of your choice (since wood paneling is simple to reattach).
  • If your knee wall is covered with drywall, you’ll either have to remove all of the drywall or cut holes to access the space between each joist (and the same considerations for full/partial brick removal applies here as well). 

How to Insulate a Knee Wall

Let’s break down how to insulate an attic knee wall. We’ll keep it simple here, but check out our guide on how to install insulation in a ceiling for a more in-depth explanation.

  1. Gather the tools you’ll need, which may include:
    1. A hole saw
    2. A cordless drill or impact driver
    3. Joint compound (for drywalled knee walls)
    4. A pry bar or hammer
    5. Screws for drywall or wood paneling
    6. Safety equipment like goggles, gloves, and ear protection
    7. Your insulation material
  2. Remove some or all of the materials enclosing the knee wall
    1. Make sure to at least create access points between each joist
    2. If you use a hole saw, keep your cutouts to reattach
  3. Install your insulation material
    1. Per some state building codes, faced batts need to be stapled to joists
    2. Blow insulation material between each joist for full coverage
    3. Use the screws of the appropriate length for panel insulation
    4. Lay down drop cloths and cover furniture if you’re using spray foam insulation
  4. Close any holes or reattach any materials to re-cover the insulated knee wall

Optimize Your Energy Efficiency with Attic Construction

Adding insulation to a knee wall can be a simple DIY project depending on the type of attic insulation material you use, but insulation can be tricky to work with.

If you’re looking for knee wall insulation help, pest control in your attic, or any other attic cleaning services, reach out to the pros at Attic Construction. Since 2011, we’ve been providing top-notch attic services to families around the American southwest, and our high-quality customer care, excellent material choices, and professional installation are second to none. 

Contact us for a free attic inspection today—we can’t wait to help you bring your next project to life. 


Sources: 

  1. The Spruce. When to Install a Knee Wall in Your Attic. https://www.thespruce.com/knee-wall-in-attics-1821291 
  2. US Department of Energy. Where to Insulate in a Home. https://www.energy.gov/energysaver/where-insulate-home 


Are Baffles in the Attic Necessary?

While you build a new home, renovate an existing home, or convert an attic to a living space, you might wonder, “Are baffles in the attic necessary for proper attic ventilation?”

Not always. 

The answer depends on the type of roof and vent space you have (vented or unvented) and how you want to insulate your attic space. But, if your home does require attic baffles, you simply can’t skip this crucial material. Let’s break down the entire debate in more detail.

What Are Baffles (AKA Rafter Vents), and How Do They Work?

Are baffles insulation? No, but they protect your insulation in a vented roof system. 

Baffles, also known as rafter vents, are vents that direct airflow in an attic.1 Baffles can be made from:

  • Wood
  • PVC and other plastics
  • Rigid foam
  • Metal

Before we describe how baffles work with attic ventilation, let’s define two different types of ceilings:

  • Traditional, horizontal ceilings – In a traditional ceiling, a joist network separates an unconditioned attic space from a conditioned interior space. The US Department of Energy recommends typeting the attic interior.2 Drywall (installed on the bottom side of the joist network) also typically separates the attic space from the conditioned space, forming a ceiling. 
  • Vaulted (AKA cathedral) ceilings – In homes with vaulted ceilings, there is no joist network between the roof decking and the home’s interior.

Homes with both traditional and vaulted ceilings need attic baffles if they utilize vented roofs, which feature:

  • Closed (or box) eaves, where the rafters are enclosed and vented via soffits
  • Ridge vents at the apex of the roof, and/or
  • Gable vents on the flat area between the roofline and the exterior walls

Baffles have three important roles in a vented roof system:

  • When the wind blows, baffles direct proper airflow from the soffits to the ridge or gable vents (or both).
  • They keep unconditioned air from directly contacting the insulation, which could cause unexpected heat transfer (also known as wind-washing).
  • They keep different types of attic insulation products (particularly blown-in insulation) from falling into and clogging the soffits.

Are Baffles Important?

“Are baffles in the attic necessary?” The answer depends on your roofing system. 

In an attic vent system, baffles are very important. But, if you have an unvented roofing system, you simply don’t need them. If your roof decking is permanently, directly affixed to your exterior wall, and your rafters are exposed on the outside of your home, you likely have an unvented roof system—also called a “hot roof.”3 

How to Install Baffles

Whether you have a traditional or vaulted ceiling, you’ll need the following tools and materials:

  • Baffles the same width as the distance between each rafter vent (in most cases, 18”)
  • A cordless drill or impact driver
  • Screws long enough to penetrate both the baffle and the roof decking (but no deeper)
  • A large piece of plywood to stand or kneel on in the attic
    • This will keep you from stepping on both the insulation and drywall
  • Safety equipment, including goggles and gloves

If you have a traditional, horizontal ceiling, you can install baffles with the following procedure:

  1. Gather your materials.
  2. From the attic, place one baffle between two rafters.
  3. Slide it down until it completely contacts the exterior wall.
    • The baffle should create a barrier between the insulation and the soffit area.
  4. Using your cordless drill/impact driver, attach the baffle to the roof decking with screws.
  5. If one baffle isn’t long enough to completely cover the attic floor insulation, attach another one above the first baffle in the same joist.

Repeat this process until you’ve added a baffle (or multiple) between every joist. Remember that the baffles don’t have to reach the ridgeline if you have a traditional ceiling—they just have to be taller than your insulation to prevent wind-washing. 

If you have a cathedral ceiling, this process is similar. But, if your vaulted ceiling is drywalled or covered with some other material, you’ll have to remove this to install baffles (and insulation). There are two things to note about this process:

  1. You’ll likely have to remove the entire ceiling surface, exposing the entire roof deck.
  2. Since there’s limited room for air flow in a vaulted ceiling, you’ll have to baffle the entire surface to direct proper airflow from each soffit to the ridge/gable vent, then install insulation around or on top of the baffles (or both). 

During the attic insulation installation, remember to take safety precautions—having a buddy secure your ladder or wearing a harness in high-ceiling areas can help prevent injuries. 

Depend on Attic Construction for All of Your Home’s Insulation Needs

Installing baffles can get complicated. Your ceiling structure and roofing system are both critical factors—and removing drywall, adding baffles and insulation, and replacing drywall in vaulted ceilings can be dangerous without proper safety precautions. 

To avoid a DIY disaster, call the experts at Attic Construction. We’ve been providing insulation removal, replacement, first-time installation, and attic cleaning services in Orange County, San Diego, and Phoenix for over a decade. We’ll help you safely and efficiently tackle all of your attic needs. 

Contact us for a free attic inspection today. 


Sources: 

  1. Green Building Advisor. Site-Built Ventilation Baffles for Roofs. https://www.greenbuildingadvisor.com/article/site-built-ventilation-baffles-for-roofs 
  2. US Department of Energy. Where to Insulate in a Home. https://www.energy.gov/energysaver/where-insulate-home 
  3. Brentwood. Hot vs. Cold Roofing: A Guide to Attic Efficiency. https://www.brentwoodindustries.com/resources/learning-center/construction/hot-vs-cold-roofing-a-guide-to-attic-efficiency/ 


Can Insulation Make You Sick?

Whether you’ve recently moved into a home with old insulation or you’re preparing for a DIY attic project, a pressing question might be on your mind—can insulation make you sick?

There are certainly negative health implications to consider related to your home’s improperly installed attic insulation—some include fiberglass-related risks, mold and mildew issues, pest-borne illnesses, and allergies. 

We’ll explore each of these and break down prevention methods that can keep you and your family safe. 

Can improper attic insulation make you sick? Yes—but attic and insulation experts can help you prevent potential health problems. 

Health Risks Related to Insulation

Bad ductwork installation, whether it is improperly installed, old, or just poor-quality insulation, has the potential to create significant health risk for those exposed. Let’s explore some of these risks in more detail.

#1 Fiberglass Risks

Introduced in the 1930s, fiberglass is a powerful material with impressive insulation capacity.1 But anytime you traverse your insulated attic space, you run the risk of being exposed to fiberglass fibers via:

  • Spin exposure from touching the material
  • Inhaling dust or fibers
  • Swallowing fiberglass particles

Luckily, fiberglass exposure generally only leads to temporary symptoms, including:

  • A skin rash developed after touching fiberglass (which should fade after a few days)
  • Red, itchy eyes
  • Sore throat and nose
  • Aggravation of asthma symptoms
  • Stomach irritation

The fiberglass injuries above are very avoidable with the right precautionary measures. Anytime you’ll be in an insulated space for a prolonged period, make sure to wear clothes and gloves that cover as much skin as possible, cover your nose and mouth with a mask, don protective eyewear, and open a window or run a portable fan to increase ventilation.

#2 Mold and Mildew Implications

Mold and mildew growth is very common, particularly in humid and warm indoor spaces—like your attic. 

While mold and mildew exposure can cause adverse health effects, not everyone is at risk.2 However, you may be particularly susceptible to mold-related symptoms if:

  • You have a respiratory condition like:
    • Asthma
    • Emphysema
    • COPD
  • You’re allergic to mold spores
  • You have an immune system condition called hypersensitivity pneumonitis

While health organizations like the CDC and WHO are still researching the health impacts of mold exposure, the conditions above can increase the likelihood that you’ll develop symptoms like:

  • Breathing problems 
  • Wheezing or coughing
  • Itchy eyes, nose, or throat
  • Skin irritation from skin contact

Eradicating the mold and reducing your overall exposure can decrease the likelihood of future reactions. 

#3 Pest-Borne Illnesses

Old or poorly-installed insulation is the perfect environment for pest infiltration—particularly by rodents, which can burrow into it. 

You might encounter rodents in your attic if:

  • Your insulation is old
  • Your insulation was poorly installed
  • Your contractor didn’t implement high-quality pest control methods
  • You had an existing pest problem that wasn’t eradicated before installing new insulation material

Rodent-related diseases or injuries are some of the most important considerations to make while managing your home’s attic or insulation.3 Rodents can:

  • Spread diseases, like:
    • Leptospirosis
    • Monkeypox
    • Rat-Bite Fever
    • West Nile virus
  • Bite or scratch
  • Damage your property
  • Leave droppings that increase infection exposure risk

#4 Allergy Symptoms

While not everyone has allergies, you may experience temporary illness or allergy-related symptoms if you’re sensitive to any of the following:

  • Mold or mildew – Insulation installed in warm, humid environments, which can cause condensation in your attic, could develop mold or mildew, which can aggravate allergies. 
  • Dust – Attics that aren’t regularly or properly cleaned may get dusty, and dust can cling to insulation fibers.
  • Animal dander – Even if you’ve eradicated rodents from your attic, their dander or hair could stay behind in your insulation.
  • Pollen – In leaky or unsealed attics, pollen could waft into the attic space, settling on insulation or other surfaces. 

Insulation itself may not trigger an allergic reaction—unless you’re allergic to fiberglass, cellulose, or another insulation material—but the age or condition of your insulation could cause an allergic response. So can old insulation make you sick? Perhaps not on its own, but yes, because of the related conditions above. 

How to Prevent Insulation Health Risks

So, how can you prevent these health risks from occurring?

  • Reducing your fiberglass exposure – If you plan to spend significant time in your attic or perform DIY insulation work, make sure to protect yourself from hazards related to fiberglass. Wear personal protective equipment (PPE), ventilate the space, and wash your hands and clothes thoroughly before touching your face. 
  • Managing mold and mildew – If you have a mold allergy, eradicate any spores growing in your attic. Clean surfaces with a bleach solution and wash your hands thoroughly after mold removal.4 Install moisture mitigation tools (like DampRid) and increase your attic ventilation with an attic fan. Learning when to use a vapor barrier with your insulation can also help limit the amount of mold and mildew in your attic.
  • Control pests – Pests should be managed by a professional—if you have rodent infiltration, contact a local pest control or attic cleaning company. After the rodents are gone, consider installing new insulation and sealing up potential pest entry points in your home. 
  • Allergy mitigation – If you have specific allergies to insulation materials, mold spores, animal dander, or dust, take over-the-counter medications to alleviate your symptoms and eliminate the allergen source in your home’s indoor air quality. 

Attic Construction: The Insulation Experts You Can Trust

While insulation may not directly make you sick, consider the illness vectors above if you experience symptoms while you’re at home. 

And, when it’s time to take action, consult with the attic professionals you can trust. Attic Construction can help you safely manage potential illness triggers in your home, keep your attic clean, and provide high-quality insulation removal, replacement, or installation.

We’re the Orange County attic cleaning experts you can lean on when tackling one of your home’s most critical spaces, as well as having experts in San Diego and Phoenix insulation installation. Attic Construction can help you reduce the risk of insulation-related health issues and improve your overall quality of life. 


Sources: 

  1. Illinois Department of Public Health. Fiberglass. https://dph.illinois.gov/topics-services/environmental-health-protection/toxicology/hazardous-substances/fiberglass.html 
  2. US Centers for Disease Control and Prevention. Basic Facts About Mold and Dampness. https://www.cdc.gov/mold/faqs.htm 
  3. US Centers for Disease Control and Prevention. Diseases Spread By Rodents. https://www.cdc.gov/rodents/diseases/index.html 
  4. Home Depot. How to Get Rid of Mold. https://www.homedepot.com/c/ah/how-to-get-rid-of-mold/9ba683603be9fa5395fab907c52351c 


Condensation in the Attic & How to Prevent It

So you climbed up into the attic to search for those Halloween decorations, only to notice mold growing along a beam. If you’re like many homeowners, you may find yourself googling “moisture in attic” and crossing your fingers that it’s fixable. 

Here’s the good news: condensation in attic spaces is absolutely fixable. And in this article, we’ll break down what causes attic moisture and walk you through several possible solutions. 

Knowing what causes attic condensation buildup can help you understand how to remove moisture from attic spaces like yours. 

What Causes Moisture in Attics

You might think of your attic as merely a place to store sleeping bags and seasonal decorations. However, their most important function is actually to serve as a barrier between your comfortable, insulated house and the temperature fluctuations happening outside throughout the year. 

Attic moisture problems can build up when warm, damp air enters it and can’t escape. As the temperature in the attic cools, the air can no longer hold as much moisture, so the water vapor becomes liquid—or, during cold winters, frost. Unfortunately, water droplets and melted frost can coalesce on roofs and beams, ultimately causing problems like mold and staining if homeowners don’t address the issue.1 

While your attic space can have condensation on the ceiling in summer, it’s more common during the other seasons. This is because your home is warm, but outside temperatures are colder or transitioning.

You might develop condensation buildup in your attic if:

  • You have insufficient attic vents, keeping moist air trapped in your attic instead of allowing it to circulate and flow back outside.1
  • Your bathroom or appliance vents run directly to the attic, releasing hot and humid air into the space.1
  • You have too many items stored in the attic space, blocking vents and preventing air from circulating.1
  • You have poor insulation around attic entrances or attic floors that allows more warm air from the house to infiltrate the attic.1

If you notice mold, stained or discolored wood, or condensation pooling throughout your attic, you might have excess moisture up there.1 While a bit of water might not seem like a problem, regular condensation in the attic can cause both short- and long-term challenges. 

Why Condensation in Attics Can Cause Problems 

When we’re juggling life, work, and family, home repair can sometimes fall lower on the to-do list, especially when it doesn’t feel urgent. But addressing attic condensation as soon as you notice it can make a huge difference. If left unaddressed, attic moisture can cause both cosmetic and structural problems. 

It can: 

  • Reduce the resale value of your home – If you have enough water vapor from condensation, it can stain rafters, beams, and other wooden areas of your attic. Additionally, if the damp environment leads to mold, your attic can end up with mold stains, even after you’ve scoured and removed the mold. Aside from this being unpleasant for you to look at, stains can ultimately hurt your house’s resale value if you choose to sell in the future.1
  • Lead to structural deterioration – In some cases, the moist environment can lead to moldy or rotten wood. If left untreated, you can end up with serious structural deterioration and an expensive repair bill in the future.1
  • Spread mold spores throughout the home – If attic condensation leads to mold growing in your attic, then your home’s ventilation system could end up spreading the spores throughout the entire house. Over time, living with mold can cause symptoms like coughing, stuffy noises, and even mild difficulty breathing.3 If you’re wondering, “can insulation make you sick,” read up on the topic to make sure that potential insulation problems don’t cause health issues for you and your family.

All of that said, these problems are worst-case scenarios. If you take the appropriate steps to reduce attic condensation as soon as you become aware of the issue, you should be able to keep your attic unstained, structurally sound, and blissfully free of mold.

How to Reduce Moisture in Your Attic

Because several factors can contribute to attic moisture, we recommend talking to an expert when determining the most effective way to reduce the condensation in your particular attic. 

A contractor will probably recommend one or more of the following solutions:

  • Store less in the space – Many people use their attics for storage. But as we mentioned above, if you have too many items stored in the attic, they can block vents and prevent moist air from circulating—and eventually leaving the attic. Promote airflow by reducing how much you’re storing in the attic, and keep whatever’s left well away from any vents. If you don’t have time to tackle it yourself, you can try hiring an attic cleaning service.1
  • Add more roof vents – If you’ve cleaned out your attic and you still see condensation, you might not have enough attic ventilation. Adding more roof vents can help moist air escape outside instead of it transforming into condensation inside. You can consult with a contractor to see if this solution makes the most sense for your house or if another option on this list might work better.1
  • Reroute improper venting – If your home wasn’t built to code, your bathroom or appliances may vent moist air directly into the attic. To remedy this, consider hiring a contractor or construction service to reroute your vents.1 In addition to helping prevent attic condensation—and all the problems that come with it—getting your vents up to code will reduce any inspection-related barriers to selling your home in the future.
  • Reduce warm air leakage – Warm air can also move from your top floor to your attic through a poorly sealed attic access hatch.2 To reduce warm air leakage, try applying self-sticking weather stripping to the edges of the attic door. You can also hire an expert to apply fiberglass insulation to the back of the attic door. Knowing when to use a vapor barrier with your insulation can also help reduce warm air leakage in your home.
  • Improve your insulation – Improving your insulation can prove one of the best ways to keep the warm air inside of your home from escaping up into your attic—where it can become damaging condensation.1 In some cases, bad ductwork installation can be the root of these problems. In other cases, the insulation is simply old and could use an upgrade. That said, it’s also possible to over-insulate your attic, which can prevent any moist air that does get in from escaping. Hiring an expert can help you thread that needle and achieve the ideal level of insulation. 

You can also help reduce the risk of future mold infections taking hold by checking your attic a few times a year for condensation, mold, or newly discolored wood.

If you have concerns over a damp attic, one temporary fix is to place moisture absorption materials in the space until a professional can take a look. They’re available at any hardware store and should be easy to find, but remember that this will only deal with short-term symptoms of the problem. Catching mold early—and addressing the cause—can help prevent bigger structural issues down the road.

Choosing the Best Insulation

When it comes to choosing an insulation material for your attic, we recommend fiberglass. Composed primarily of glass, fiberglass traps air in a way that slows the transfer of heat, making it ideal for keeping your home warm during the winter and cool during the summer—and for preventing the warm air transfer that can produce pesky attic condensation.

Here’s why we recommend fiberglass insulation:4

  • It’s energy-efficient – When installed correctly, fiberglass insulation could reduce your heat and air-conditioning bills by roughly 40% to 50%.
  • It’s eco-friendly – Made out of almost 30% recycled materials, fiberglass is one of the more eco-friendly insulation options available.
  • It fits a wide variety of physical spaces – Because fiberglass insulation comes in several different standard shapes—rolls, pre-cut panels, and loose-fill—it can easily fit attics of any size and dimensions. That can prove especially important for houses with irregularly shaped attics. 
  • It’s a natural fire retardant – Because the glass and sand found in fiberglass act as a natural fire retardant, using fiberglass insulation in your home can help provide an extra layer of protection against blazes. If you live in an area affected by wildfire season, you may want to prioritize insulation options like fiberglass that can help provide an extra layer of flame-retardant. 

If you do decide to use fiberglass insulation when improving your attic, you’ll have to select the specific type of fiberglass insulation you want to use. Different types of insulation are categorized by their R-value (i.e., how well they slow heat transfer). A higher R level means less heat will move through the insulation. 

In addition to installing your insulation correctly, a professional can help you select the best R-value for your house and climate.

Improve Your Attic’s Insulation with Attic Construction

At Attic Construction, we offer a range of services to help keep your house well-maintained, including attic cleaning, insulation removal, and attic insulation installation. 

Founded in 2013, we’re proud to be our market’s number-one rated company for attic insulation, attic cleaning, rodent proofing, and rodent decontamination. Our customers span San Diego, CA, Orange County, CA, and Phoenix, AZ, and benefit from excellent customer service, highly trained experts, and top-of-the-line equipment.

To put it another way: we make customers happy and confident in their attic’s performance. 

Whether you want to protect your attic against rodents or fight the good fight against attic condensation, we’re here for you—because every house should feel like a home.


Sources: 

  1. Life Savvy. Tips for Preventing Mold in Your Attic. https://www.lifesavvy.com/131008/tips-for-preventing-mold-in-your-attic/ 
  2. Ottawa Citizen. House Works: Understanding attic condensation. https://ottawacitizen.com/life/houseworks-understanding-attic-condensation 
  3. Housing Digest. 3 Hacks To Help You Easily Put In A New Bathroom Exhaust Fan. https://www.housedigest.com/985027/hacks-to-help-you-easily-put-in-a-new-bathroom-exhaust-fan/ 
  4. Forbes. Learn The Pros And Cons Of Fiberglass Insulation. https://www.forbes.com/home-improvement/insulation/what-is-fiberglass-insulation/#:~:text=Energy%20Efficient%3A%20On%20average%2C%20fiberglass,also%20help%20with%20noise%20reduction

When to Use an Attic Vapor Barrier: A Guide

Vapor barriers may not be one of the most glamorous home upgrades, but they can be one of the most important for your health and the longevity of your living space. When used in the right context, they can prevent excess moisture from accumulating in your home—and sidestep a slew of potential problems that can come along with it, like mold and mildew growth, pest infestations, health problems, and more.

Not sure when to use vapor barrier with insulation? Well, the answer may already be written in your county’s building code in accordance with the average humidity levels of your local environment. 

When it comes to your home’s integrity, what’s out of sight should never be out of mind. An attic insulation vapor barrier could ensure that those oft-forgotten corners of your home won’t be tied to its undoing. So, why is attic moisture defense so important, and how could you benefit from installing a vapor barrier in your ceiling insulation? Read on to find out.

What Is an Attic Vapor Barrier? 

A vapor barrier, also referred to as a vapor retarder, is a moisture-resistant material that can be applied inside an exterior wall, a crawl space, or an attic to provide vulnerable spaces with added protection against a potential moisture problem. 

Vapor barriers come in a variety of materials, with two of the most common options being plastic sheeting and aluminum foil.

The best vapor barrier materials and installation methods to use for a particular home typically depend on factors such as: 

  • How your home is constructed
  • What insulation building material you’re using
  • What kind of climate zone you live in

When installed with the proper care and consideration for your home and the local climate zone, an attic moisture vapor barrier can provide a critical defense in the battle against indoor moisture buildup. 

4 Reasons to Use Vapor Barriers to Reduce Interior Moisture

Generally speaking, vapor barriers are considered an essential moisture-blocking tool for climates that experience significant levels of humidity. For that reason, building codes in more humid locations will often require them, in which case you might not have much say about whether to install one or not. In drier climates, however, attic vapor barriers can be more of an optional add-on than they would be elsewhere.

Voluntary or not, the following are just some of the benefits you could experience if you decide to install an attic vapor barrier in your home. 

#1: Reduce The Risk of Mold and Mildew Developing in Your Home

In natural environments, mold and mildew play an integral role in breaking down organic materials. But when they’re present indoors on an interior surface, they can cause plenty of unwelcome damage to our homes and our health. If you find yourself wondering, “can insulation make you sick,” make sure to read up on the topic to ensure you and your family are safe against any insulation problem.

The best way to prevent mold and mildew development is to limit the condensation in your attic since the conditions they tend to thrive in include: high temperatures and high moisture levels. So, when the hot air inside your home rises or the sun’s heat radiates through your roof—and it doesn’t have sufficient insulation or a radiant barrier to mitigate it—a humid climate in your attic can become a prime breeding ground for mold and mildew.

This is a problem because mold and mildew aren’t just unsightly. When left unaddressed, they can freely feed on wet wood and other materials, potentially weakening your home’s walls and floors and leading to dangerous (or expensive) structural problems. 

Mold and mildew also enjoy feeding on:

  • Insulation
  • Carpet
  • Paper
  • Cardboard
  • Ceiling tiles
  • Wallpaper
  • Dust
  • Drywall
  • Upholstery

The Environmental Protection Agency (EPA) states that maintaining an indoor humidity level between 30% and 50% is ideal for limiting mold and mildew growth, as well as reducing the odds of pest infestations.1 

#2: Keep Your Home Protected Against Pests

Speaking of pests, it’s not just mold and mildew that thrive on warm temperatures and humidity—a number of bugs and insects do, too, including:

  • Silverfish
  • Termites
  • Cockroaches
  • Powderpost beetles

When left unchecked or unprotected, attics could fall victim to a pest infestation, potentially causing serious structural damage to your house or posing health risks to those living inside it. By limiting your attic’s moisture with a vapor barrier, you’re making your attic environment a lot less appealing to unpleasant—and downright destructive—pests.

#3: Improve Your Home’s Energy Efficiency

HVAC systems do more than cool the air in your home, they also remove moisture. That means that if your home is prone to high humidity levels, your HVAC system will have to work double time to do its job effectively, thus using more energy as a result. 

Plus, more than half of energy use in homes is used for heating and cooling,2 meaning an overactive HVAC system could have a significant impact on your energy bill—and your budget. 

Keeping your home’s humidity levels within the EPA’s ideal range of 30% and 50% could help reduce the amount of energy your HVAC system uses while it cools your home. Installing an attic vapor barrier could be one strategy to accomplish precisely that. Other ways to keep high humidity levels at bay include:

  • Reducing shower time 
  • Lowering water temperatures for showers and baths
  • Drying clothes outside whenever possible
  • Using a dehumidifier to control humidity caused by gas heaters

#4: Improve Indoor Air Quality

According to the EPA, pollutant concentrations can be two to five times higher indoors than outdoors.3 The excess moisture present in your home generates mold or mildew growth or pest infestations that further degrade indoor air quality and create or exacerbate health issues.

Whether you’re working from home or working to finish a binge-worthy series before the next season launches, it can sometimes feel like the majority of our time is spent indoors. In a home with excessive moisture buildup, even seemingly harmless activities could come with serious negative health impacts—especially if you or someone else in your household already deals with asthma or other respiratory health problems. 

Indoor mold is harmful even for those in otherwise good health. Prolonged exposure can result in upper respiratory issues like coughing or wheezing.4 However, you can mitigate these kinds of health risks by taking the following steps to limit moisture buildup in your home:

  • Using a dehumidifier
  • Repairing leaks
  • Installing a vapor barrier in your attic and/or crawl spaces

4 Tips for Installing a Vapor Barrier for Your Attic

Once you’ve made the decision to invest in a vapor barrier for your home, the key to maximum effectiveness lies in using the right insulation materials and abiding by proper installation techniques. By getting this part wrong, you run the risk of trapping more moisture in your attic, worsening the very problem you’re trying to solve. 

  • Tip 1: Consider climate – What a “correct” installation looks like likely depends on what kind of climate you live in:
  •  In colder climates, where the home’s heating system sees more use, the vapor barrier should typically be installed on the insulation’s interior side. 
  • In warmer climates, where the home is often kept cooler, the vapor barrier should usually be installed on the exterior side. 
  • When it comes to mixed humidity climates, whether the vapor barrier should be installed on the interior or exterior sheathing of insulation might vary, but a professional will be able to determine which is best for you.
  • Tip 2: Factor in permeability – Your climate could also influence the level of permeability your attic vapor barrier will require. The vapor barrier will need to have at least some level of permeability so that moisture isn’t trapped on either side of it. 
  • Tip 3: Determine the most vulnerable side – When installing insulation with a vapor barrier, the vapor barrier should usually be applied on the side of the insulation that’s closest to where it will be exposed to the most warmth and moisture. 
  • Tip 4: Consider hiring a professional – Some homeowners may try a DIY-style attic vapor barrier installation, but as mentioned, this could come with more headaches than it’s worth. Bad ductwork installation could lead to trapping the moisture you’re trying to reduce, leading to wasted time and money and even more moisture problems than you had before. 

For some homeowners, hiring a professional to install an attic vapor barrier in a crawl space or foundation wall means more peace of mind—and expenses saved down the road. A professional will be able to evaluate the right kind of vapor barrier for your home based on the necessary factors like your attic’s construction, your local climate, and what kind of insulation you’re using.

Attic Construction: Your Hub For All Things Attics and Home Protection

When you’re looking attic cleaning in Orange County, San Diego, or Phoenix insulation installation, Attic Construction is just a phone call or email away. 

If you think you might need insulation or cleaning services for your attic space, but you just aren’t sure, we offer free attic inspections to help you assess your home’s upper-level needs. Plus, you won’t pay a cent unless a repair or service takes place. And if you’re concerned about your attic’s moisture levels, we’re happy to evaluate them in our inspection and present you with the best options for how to proceed. 

Ready to explore those options for a cleaner, healthier, and better-insulated home? Contact Attic Construction today.


Sources: 

  1. Environmental Protection Agency. Why and Where Mold Grows. https://www.epa.gov/mold/mold-course-chapter-2#Chapter2Lesson5
  2.  U.S. Energy Information Administration. Use of energy explained. https://www.eia.gov/energyexplained/use-of-energy/homes.php
  3. Environmental Protection Agency. Indoor Air Quality. https://www.epa.gov/report-environment/indoor-air-quality#note1
  4. Centers for Disease Control and Prevention. Basic Facts about Mold and Dampness. https://www.cdc.gov/mold/faqs.htm

How to Seal Ductwork in Your Attic: A Guide

Air ducts are the home’s circulatory system, responsible for distributing the warm and cool conditioned air that keeps your residence at the desired temperature. However, as with any system, inefficiencies can arise, leading to weaker heating and inadequate cooling from air conditioning units, contributing to higher energy bills. 

Learning how to insulate ductwork in the attic is just one essential aspect of the job. Air duct sealing is another matter. Whether it’s because of the tricky size of the space or the confounding HVAC choices of a previous owner, the attic can be a prime culprit when it comes to leaky air ducts. 

In this guide, we’ll explain how to tell if your air ducts are leaking and walk through how to seal ductwork so that your HVAC system operates at maximum efficiency. 

Are Your Air Ducts Leaking? 

Before we get into how to seal HVAC ducts, let’s first run through the symptoms of a leaky duct system. If you’re experiencing any or all of these conditions, then it may be time to check the integrity of your ventilation system:

  • Higher than normal energy bills – Leaky ductwork means that your heating and cooling system has to work extra hard to maintain the home’s desired temperature. The result can be increased energy bills every month. 
  • Uneven heating and/or cooling – If some rooms in your home are warmer or cooler than others, that can suggest a duct leakage. You also might notice the phenomenon that certain areas of individual rooms are hotter or cooler than they should be. Basically, if your temperatures are uneven, that’s a sign. 
  • Excessive dust – Does your house seem perpetually dusty no matter how often you clean it? That can be caused by compromised ductwork, especially in the attic. Because the attic is typically dusty, duct leakage can begin sucking in dust and pushing it throughout the rest of the house. 
  • Poor air quality – This symptom goes hand-in-hand with an excess amount of dust. If you’re noticing a musty smell throughout the house or finding that your allergies are more inflamed than normal, that’s an unfortunate indicator of leaky ductwork. 

How to Find an Air Leak

If you believe your ductwork is leaking, the next step is identifying the source. The attic is a likely location for a variety of reasons. Because of space restrictions, ductwork in attics may be constructed with many joints and bends, which are all susceptible to leaking. 

Attic ductwork can also be competing for space with other fixtures (like the assembly sides of ceiling fans from the floor below) or insulation. In the case of older homes that weren’t built with modern HVAC needs in mind, the ductwork can simply become a neglected mess. 

The simplest way to check for an air duct leak in your attic is to perform a visual inspection. When examining your ductwork, keep an eye out for sections that have:

  • Rusted
  • Been crushed
  • Developed kinks
  • Have rodent chewing

Those areas can often be the source of pesky leaks. 

Also, keep an eye out for spots that have been previously patched. Over time, sealant can wear off and this might call for an air duct replacement. As noted below, this can be particularly true when common duct tape is used as a seal.

More Ways to Measure Leakage

Most of the time, you’ll be able to feel the air escaping from the system. However, if you’re unable to spot the leak with just your eyes and hands, there are a few other tricks you might consider:

  • Use a smoke pen – Smoke pens can spot the movement of air escaping from ducts. 
  • Suds up your ducts – Soapy water can be sprayed on ducts. Leaks will then reveal themselves in the form of bubbles rising from the tubes. 

If you’re interested in more thorough results than what your bare hands and soapy water might reveal, consider having a professional conduct a duct blaster test. Duct blasting is the standard for HVAC testing amongst home inspectors and is done by sealing the vents in a household, pressurizing the ducts, and then measuring leakage. 

A duct blaster test will also give you an idea of just how much air is escaping from your HVAC system, which can be a useful comparison point after you’ve sealed your ducts. 

Benefits of Sealing Air Ducts

The benefits of properly sealed ductwork are numerous. They are pretty much the opposite of our aforementioned leaky ductwork symptoms. 

With completely sealed ductwork, you’ll enjoy:

  • Lower energy costs
  • More thorough heating and cooling
  • Better air quality

The energy benefits of sealed ductwork cannot be overstated. The Depart of Energy estimated that leaky ductwork could account for upwards of 30% of a home’s energy costs.1 That’s a lot of extra money to part with every month. 

Beyond just the benefits to the individual homeowner, sealing ductwork is also an environmentally conscious choice. In this day and age, no one wants to waste energy unnecessarily. 

Considering those positive impacts, it’s imperative that every homeowner keep their ductwork properly maintained. So, how do we go about sealing a leak?

3 Ways to Seal a Leaking Air Duct

There are three common ways to get the job done when it comes to sealing air ducts.2 We go over all three methods below. 

Keep in mind that the easier the fix, the less reliable the result. For long-term benefits, it’s best to ensure that your ductwork is sealed securely and permanently. 

Method #1: Duct Tape (But Not Literally Duct Tape)

The simplest method to seal a leaky air duct is to use adhesive tape to patch up the gap. Using tape is a quick and simple fix, but not a long-lasting one. 

Over time, the air and moisture blowing through your air ducts will wear away the tape’s adhesive. Eventually, the tape will peel away and you will need to seal your air duct again—except this time, you’ll have tape gunk on your duct that may make the job a little more complicated. 

This is especially true of duct tape. Despite its name, duct tape is not actually made for use on air ducts. While it’s good for a number of other household projects, the adhesive on duct tape is not made to withstand the temperature changes common with air ducts. 

Using tape is essentially a quick fix until you’re ready to do a more thorough sealing of your air ducts. For the best results, look for one of these kinds of tape at the hardware store:

  • Oriented polypropylene tape 
  • Aluminum foil tape

Method #2: Mastic Duct Sealant

A water-based mastic duct sealant is a much more permanent solution than tape, offering tighter seals. This thick paste can be applied directly to ductwork using either a caulk gun or a paintbrush. 

When working with mastic sealant, remember that you should:

  • Clean the area before applying the seal (especially if there’s tape residue left behind from the previous patching)
  • Wear gloves and long sleeves
  • Wear a mask, especially if working in a space without access to fresh air

Once mastic duct sealant hardens on your air ducts, removing them can be difficult and messy. For that reason, ensure that you won’t need to disassemble the ductwork in the near future. If you’re planning to clean your air ducts (always a good idea if you’re suffering from odors or poor air quality), you should do so before applying the sealant. 

Method #3: Have a Technician Aeroseal Your Duct Work

Arguably the longest-lasting solution to sealing leaky ductwork is also the least DIY. To use the Aeroseal method to seal your ductwork, you’ll need the help of a licensed technician. 

Aerosealing is done by first closing and pressurizing your ductwork, similar to how the duct blaster we described above works. Once the ducts are closed off, the Aeroseal machine pressurizes the ducts. Hot polymer glue is then sprayed into the duct and blown through the system with a fan. 

Because the air duct is sealed, the glue will be drawn to any cracks in the ductwork, where it will dry and harden. Essentially, Aeroseal patches your compromised ducts from the inside. The Aeroseal process is great for sealing hard-to-reach or hard-to-find fissures in your ducts, which can be especially common in attics. 

It’s also important to note that the glue is non-toxic and contains the same materials as pacifiers and chewing gum. 

Attic Construction Can Plug Your Leaks

By now, you hopefully understand the benefits of having a properly sealed ventilation system. From lower energy bills to improved air quality, ensuring your HVAC system is free of leaks basically pays for itself. 

If you need more help than what’s provided in this guide, Attic Construction is here to help.

We have over ten years of experience in air duct cleaning in San Diego and Phoenix areas. Our experienced contractors can help find inefficiencies in your ductwork and bring them up to standard, all with the professionalism that has made us one of the most reputable attic cleaning companies in Orange County. 

If you’ve got questions about the information provided in this guide or think you need a helping hand sealing your ductwork, get in touch with us today!


Sources: 

  1. ACHR News. DOE: Leaky Ducts are Top Energy Waster. https://www.achrnews.com/articles/124595-doe-leaky-ducts-are-top-energy-waster
  2. Attainable Home. Beginner’s Guide  to Air Duct Sealing: Three Proven Methods. https://www.attainablehome.com/beginners-guide-to-air-duct-sealing/


3 Types of Duct Insulation for Attics

Are your energy bills out of control? Does it seem like your HVAC unit is working overtime, but your house still isn’t reaching the desired temperature? 

It sounds like you might need to insulate your air ducts. 

Learning how to seal ductwork properly is the key to a more energy-efficient and comfortable home. But with a few different types of duct insulation, choosing the one that’s right for you can be overwhelming.  

Read on for a breakdown of the three different types of duct insulation. 

Duct Insulation Types

There are three types of insulation commonly used on air ducts. While some of these insulations can be applied inside the actual ducts, that’s really only practical if you’re putting in a whole new HVAC system. More often, you will use these insulation types on the outside of your existing ductwork insulation. 

The three types of duct insulation are: 

  • Duct board – This flat and study material comes in various R-values. Because of its inflexibility, duct board is typically only used with rigid ductwork. While this might be viable in modern homes or rooms outside the attic, the duct board’s size and shape may pose some difficulty for tight spaces like the attic. 
  • Duct liner – This material is used inside ducts and may not be practical unless you pull apart your HVAC system. 
  • Duct wrap – The most common form of duct insulation type, duct wrap is measured and wrapped around ductwork to insulate. Duct wrap comes in various materials, from simple bubble wrap to fiberglass. 

Types of Insulation Materials

There are three common materials that most types of duct insulation are made from. Deciding which material is right for your ductwork insulation depends on your home, your budget, the space you’re insulating, and the kind of ducts you have. 

The three most common air duct insulation materials break down like this: 

  • Fiberglass – The most common insulation material. If you ask someone to visualize insulation, they probably imagine pink and puffy rolls of fiberglass insulation. Flexible rolls of fiberglass are especially well-suited for attics, where their pliable shapes can be easily contorted around complex ductwork. 
  • Polyethylene – Compared to fiberglass, polyethylene insulation is more expensive. That said, polyethylene is suited to outdoor ductwork as it’s made to withstand the elements.
  • Rockwool – Another more expensive choice than fiberglass, rockwool offers soundproofing features. If you’re insulating the inside of your ductwork, rockwool tends to be a good choice because its durability makes it less likely to tear. For the environmentally conscious, rockwool is made from recycled materials, which make it a green alternative.

The most commonly used combination of insulation type and material is fiberglass duct wrap for insulating the air ducts in an attic. 

What is R-Value?

If you’re shopping for insulation, you’ve likely encountered the term “R-value.” That indicates how much thermal resistance each kind of insulation has. The higher the insulation R-value, the more resistant it is to heat flow. 

Different parts of the country require insulations with different R-values. For example, when insulating ductwork in an attic in California, you’ll want to get insulation with a minimum 30 R-value. 

Reasons to Insulate Ductwork

Before getting into the different types of insulation, it’s important to understand how to insulate ductwork in attic and the benefits of properly insulated air ducts. 

The conditioned air that passes from your HVAC system through your ductwork can often run into problems, particularly in the attic, which isn’t typically air-conditioned or heated. This means the unconditioned air from the attic, along with its dust and odors, can seep into your uninsulated air ducts and change the temperature and quality of the air. 

With properly insulated air ducts, you’ll enjoy:

  • Better air quality throughout the house
  • A less fatigued HVAC system
  • A quieter environment that’s free of odors
  • Lower energy costs

Insulating air ducts is a project that eventually pays for itself.1 The question isn’t so much whether or not you should insulate (you should), but what insulation you should use. 

Insulate Your Ductwork with Attic Construction

There are numerous benefits to insulating the ductwork in your attic. But, even once you’ve learned about the different duct insulation types, you might still feel overwhelmed taking on such a project yourself. 

The friendly professionals at Attic Construction are here to help. 

We have decades of experience with air duct cleaning in San Diego, Phoenix, and the Orange County area. We’ve seen every kind of ductwork out there and haven’t yet encountered an attic so cramped or cluttered that we couldn’t work out a way to improve the home’s energy efficiency. 

Don’t waste energy—let the folks at Attic Construction help figure out which duct insulation is right for you. 


Sources: 

  1. Forbes. How Much Does Duct Insulation Cost? https://www.forbes.com/advisor/home-improvement/duct-insulation-cost/


Free Inspection

"*" indicates required fields

This field is for validation purposes and should be left unchanged.
Address